Prepare the project
- Add company branding. In Settings, enter the company name and contact details and choose a logo.
- Review the customer. Complete the name, address, visit date, technician, and relevant job notes.
- Curate Project Devices. Include only the equipment that belongs in the client record; assign rooms and friendly names where useful.
- Review measurements. Remove obvious test runs and ensure saved Wi-Fi snapshots have meaningful locations.
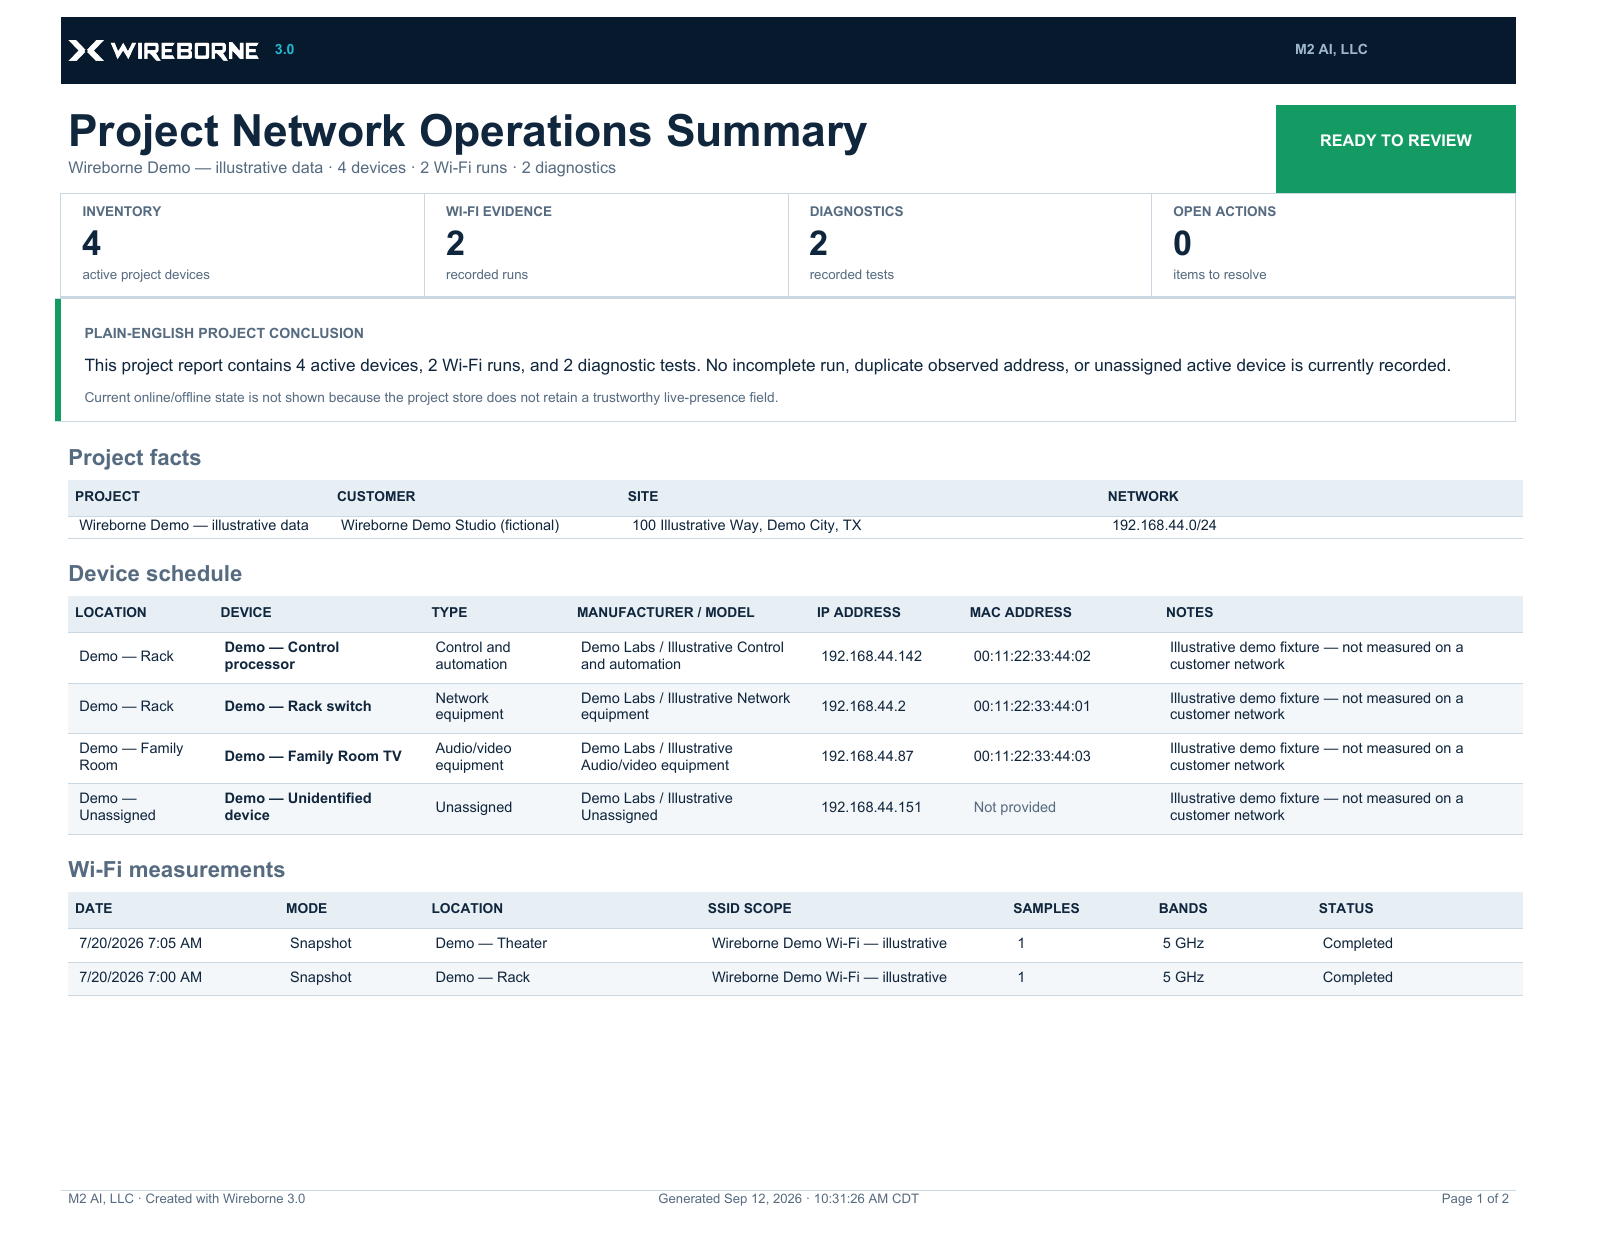
What the PDF can include
Create the report
- Open File → Export PDF report.
- Choose included sections. Leave out empty or irrelevant sections rather than publishing blank pages.
- Preview pagination. Check that tables stay within the page, headings are not stranded, and long notes wrap cleanly.
- Choose the destination and export. Use a useful name such as
Smith-Residence-Network-Report-2026-07-18.pdf.
Review the actual PDF
Open the exported file in a PDF reader. Check every page—not just the preview—for logo quality, clipped columns, blank pages, repeated headings, location spelling, and customer information.
Network reports can contain sensitive IP, MAC, equipment, and location information. Deliver and store them according to your company’s security policy.