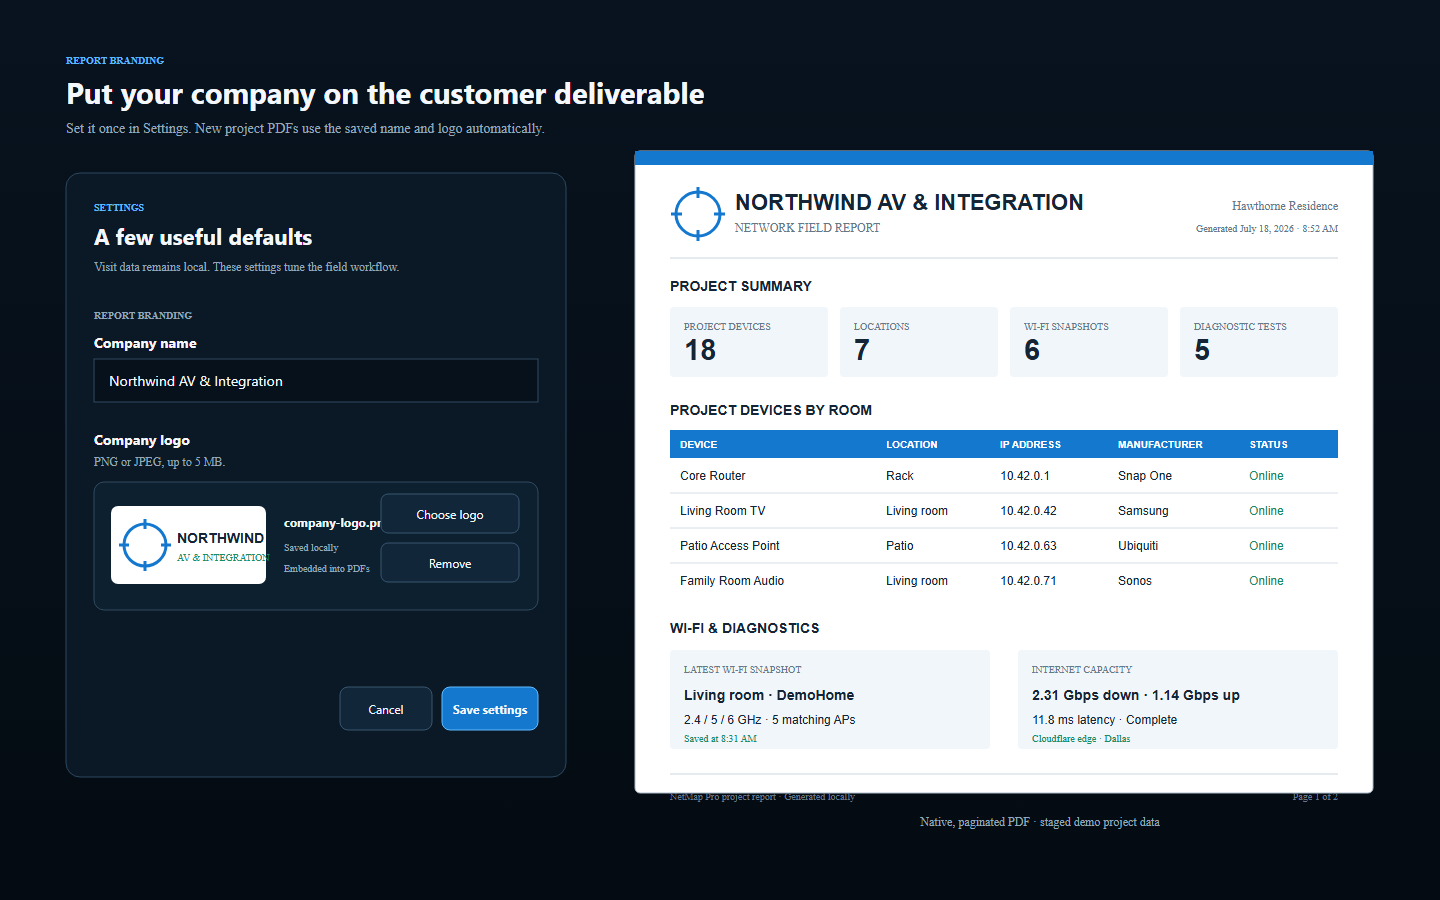
Open Settings
Use the standard app menu at the upper left and select Settings. The settings page is intentionally compact; operational fields such as customer details and room names stay inside their relevant project workflow.
Add your company profile
- Company or trading name
- Phone number and email address
- Website
- Optional license or certification line
- Default technician name
Review the values exactly as a customer should see them. These fields can appear in the PDF header or footer.
Add a logo
- Select Choose logo. Use a PNG or JPG with clear edges and adequate resolution.
- Review the preview. A wide horizontal logo generally fits the report header better than a tall square mark.
- Save settings. Generate a sample report before the first client delivery.
Useful preferences
Settings may include defaults such as row density, last physical adapter preference, report footer text, update checks, and license status. Scan range, active customer, and job-specific rooms remain project controls rather than global preferences.
Where settings are stored
Company identity and local application preferences are stored on the Windows computer. Project data and reports remain local unless you choose to copy or upload them elsewhere.
If multiple technicians share a computer, confirm that the saved branding matches the company producing the report.